They were all dirty, but for $3 - what the heck -decided I could wash them and took them home. After washing I found that most of them were pretty scratched up. Sigh. When will I learn? I decided to find a way to salvage them because a) I like mod plastic planters and b) I had nothing to lose. So I came up with a few ideas to salvage them and here is idea #1.
Planter in it's before state. Pretty sad. Scratches were enhanced by my camera, it actually didn't look quite this bad.
Sad planter with Contact Brand Adhesive Cork
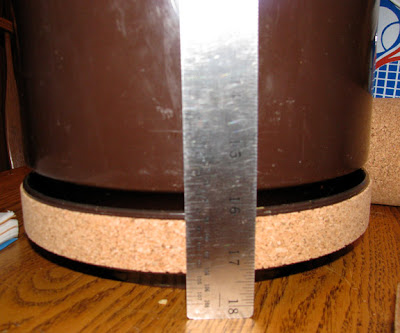
I measured the diameter of the pot and the bottom saucer piece. Then I measured how wide I wanted it. I used a ruler and made a line because the lines skip where there is text on the liner side of the contact paper. I wanted to make sure I cut it as straight as possible. This pot was 28" in diameter and I added about an inch to that to make sure I didn't run out. Since this pot was so scratched I wanted to mostly cover it up with just a little brown showing.
I needed a 4" x 28" length (plus my extra 1") and cut out a piece that was 4" x 29" for the pot. I cut a 1" x 29" piece for the saucer.
I found it helpful to get the saucer off the table while I was working on it and put it on top of a plastic container, since this was a large planter.
The saucer part went really well (see below). But the pot part didn't. While I thought the pot was straight up and down, it had a slight angle to it and so the diameter was at least a 1/2" wider at the top. When I tried to put the cork on it wouldn't lay flat.
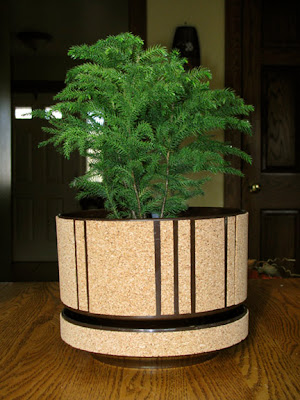
So, onto plan B - Working with smaller pieces! I took my big piece that I had cut out and cut it into strips that were 1/2", 1'1/2" and 3" wide. I worked out a simple pattern for the stripes.
I decided it was a good idea to have a straight line to start on. So I took a ruler, held it next to the planter, making sure it was resting solid on it's end and then used a marker to draw a line on the pot. If I really wanted to be precise I could have used a level, but the basement was too far and c'mon, I'm winging it here.
When I put the pieces on I angled them in just slightly towards the bottom and it made up for the difference in diameter.
Ta Da! It worked!
The cork was easy to work with and fun. It has a lot of potential for other projects. My advice in using it is to have a sharp scissors and cut a little more slowly.
I planted a cute little Norfolk Pine in it that has plenty of room to grow.
So I guess it's true, sometimes when you get lemons, you need to make lemonade. In this case, I think that happened twice!
This post is linked to:


That looks awesome Jil! Very clever, well done.
ReplyDeleteVery nice and clever of you. We need to all be more thrifty.
ReplyDeleteI have passed on the Liebster Blog Award to you - it is given to up coming bloggers who have less than 200 followers.
ReplyDeletePlease visit my blog for more information.
http://dianstimpanalley.blogspot.com